Build stronger legs without pain. Discover our list of knee friendly leg exercises, with step-by-step instructions and pro tips for safe, effective workouts.
Leg day shouldn't be a source of dread. If knee pain, stiffness, or instability has you skipping workouts, you're not alone. The common misconception is that all leg exercises are bad for sensitive knees, forcing many to abandon lower body training altogether. This approach often backfires, leading to weaker support muscles, greater joint instability, and a cycle of chronic discomfort.
The real issue isn't the act of training your legs; it's the selection and execution of the exercises. High-impact movements and improper form can place excessive shear and compressive forces on the knee joint, aggravating conditions like arthritis, patellofemoral pain, or old injuries. Additionally, issues elsewhere in the kinetic chain, such as poor ankle mobility, can force the knee to compensate, leading to pain. It's often helpful to assess your ankle dorsiflexion to see if limitations there are contributing to your knee issues.
The solution is to build a smarter leg day centered around targeted, knee friendly leg exercises that strengthen the quadriceps, hamstrings, glutes, and hips without compromising joint integrity. This guide provides a curated list of eight science-backed movements designed for this purpose. We'll break down the precise form for each, offer clear progressions and regressions for all fitness levels, and show you how to build an effective routine. Our goal is to provide you with the tools to build strength, enhance stability, and find relief, empowering you to reclaim leg day with total confidence.
1. Isometric Wall Sits
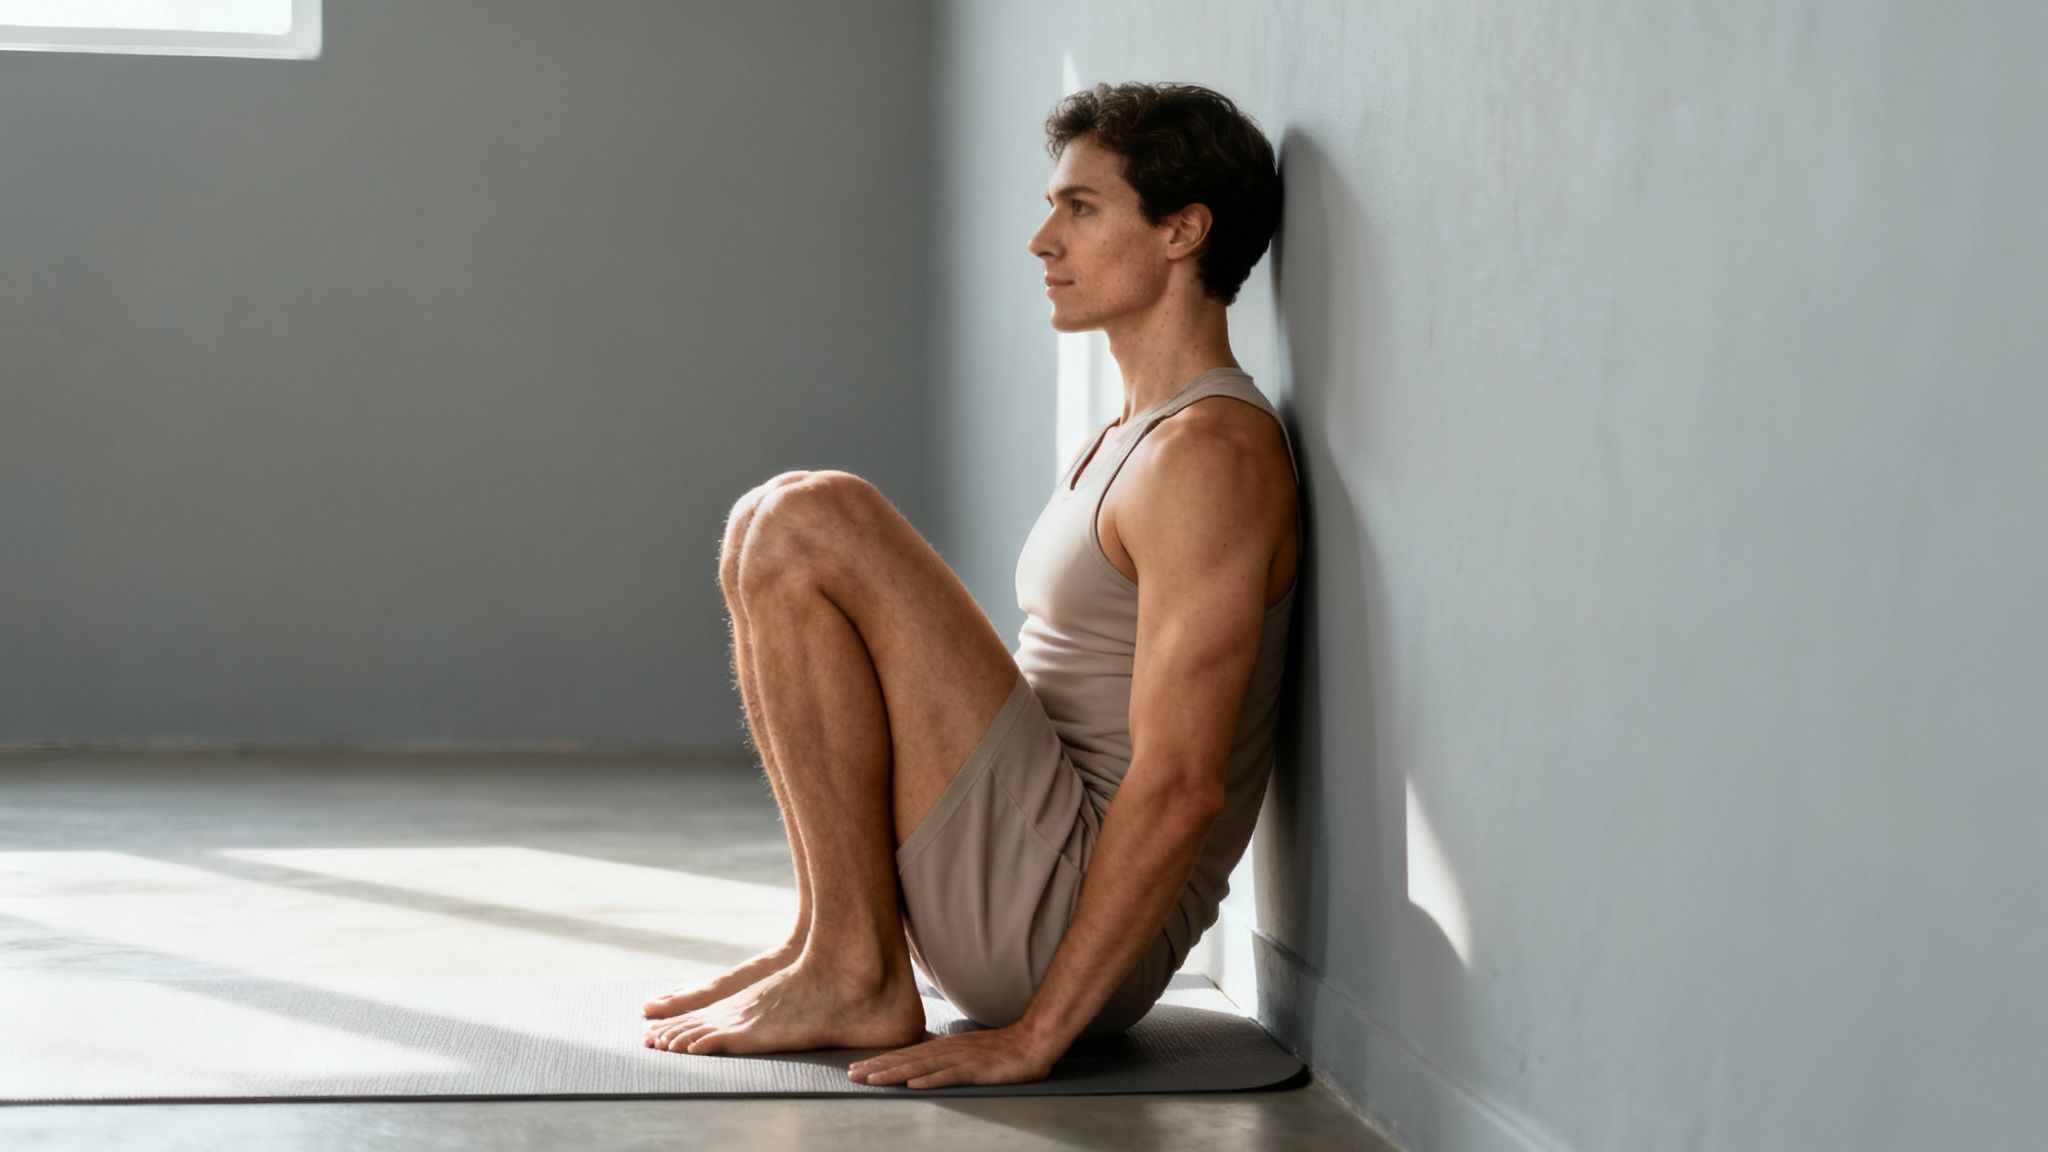
An isometric wall sit is a powerful static exercise where you hold a squat position with your back supported against a wall. This movement builds immense strength and endurance in the quadriceps, glutes, and hamstrings without requiring any joint movement. Because there is no dynamic flexion or extension at the knee, it is one of the safest and most effective knee friendly leg exercises for strengthening the muscles that support the joint.
This static hold removes the dynamic stress that can aggravate sensitive knees, allowing you to challenge your muscles without impact. It is a foundational exercise used in physical therapy for post-injury rehabilitation, such as for athletes recovering from ACL surgery. By holding the position, you create sustained tension in the muscles, which enhances muscular endurance and stability.
How to Perform a Wall Sit
- Starting Position: Stand with your back flat against a sturdy wall. Walk your feet out about two feet in front of you, keeping them shoulder-width apart.
- Execution: Slowly slide your back down the wall until your thighs are parallel to the floor, creating a 90-degree angle at your knees. Ensure your knees are stacked directly above your ankles, not drifting forward past your toes.
- Hold: Maintain this position, keeping your core engaged, chest up, and your entire back pressed firmly against the wall. Breathe steadily throughout the hold.
Key Insight: The primary benefit comes from the isometric contraction. Your muscles are firing and working hard to hold the position, but the joint itself remains stationary. This is ideal for building foundational strength without irritation.
Actionable Tips for Success
- Start Small: Begin with 20-30 second holds and aim for 3-4 sets. As you get stronger, gradually increase the duration of each hold.
- Mind Your Alignment: Proper form is crucial. Keep your back flat against the wall and your knees aligned with your ankles to prevent unnecessary strain.
- Engage Your Core: Actively brace your abdominal muscles to support your spine and improve overall stability during the exercise.
- Don't Hold Your Breath: Focus on deep, consistent breathing to supply your working muscles with oxygen.
- Modify the Depth: If a 90-degree angle is too intense, start with a shallower bend (e.g., 45 degrees) and work your way down as your strength improves. You can explore more modifications and isometric wall sit variations to suit your fitness level.
2. Clamshells (Glute Activation)
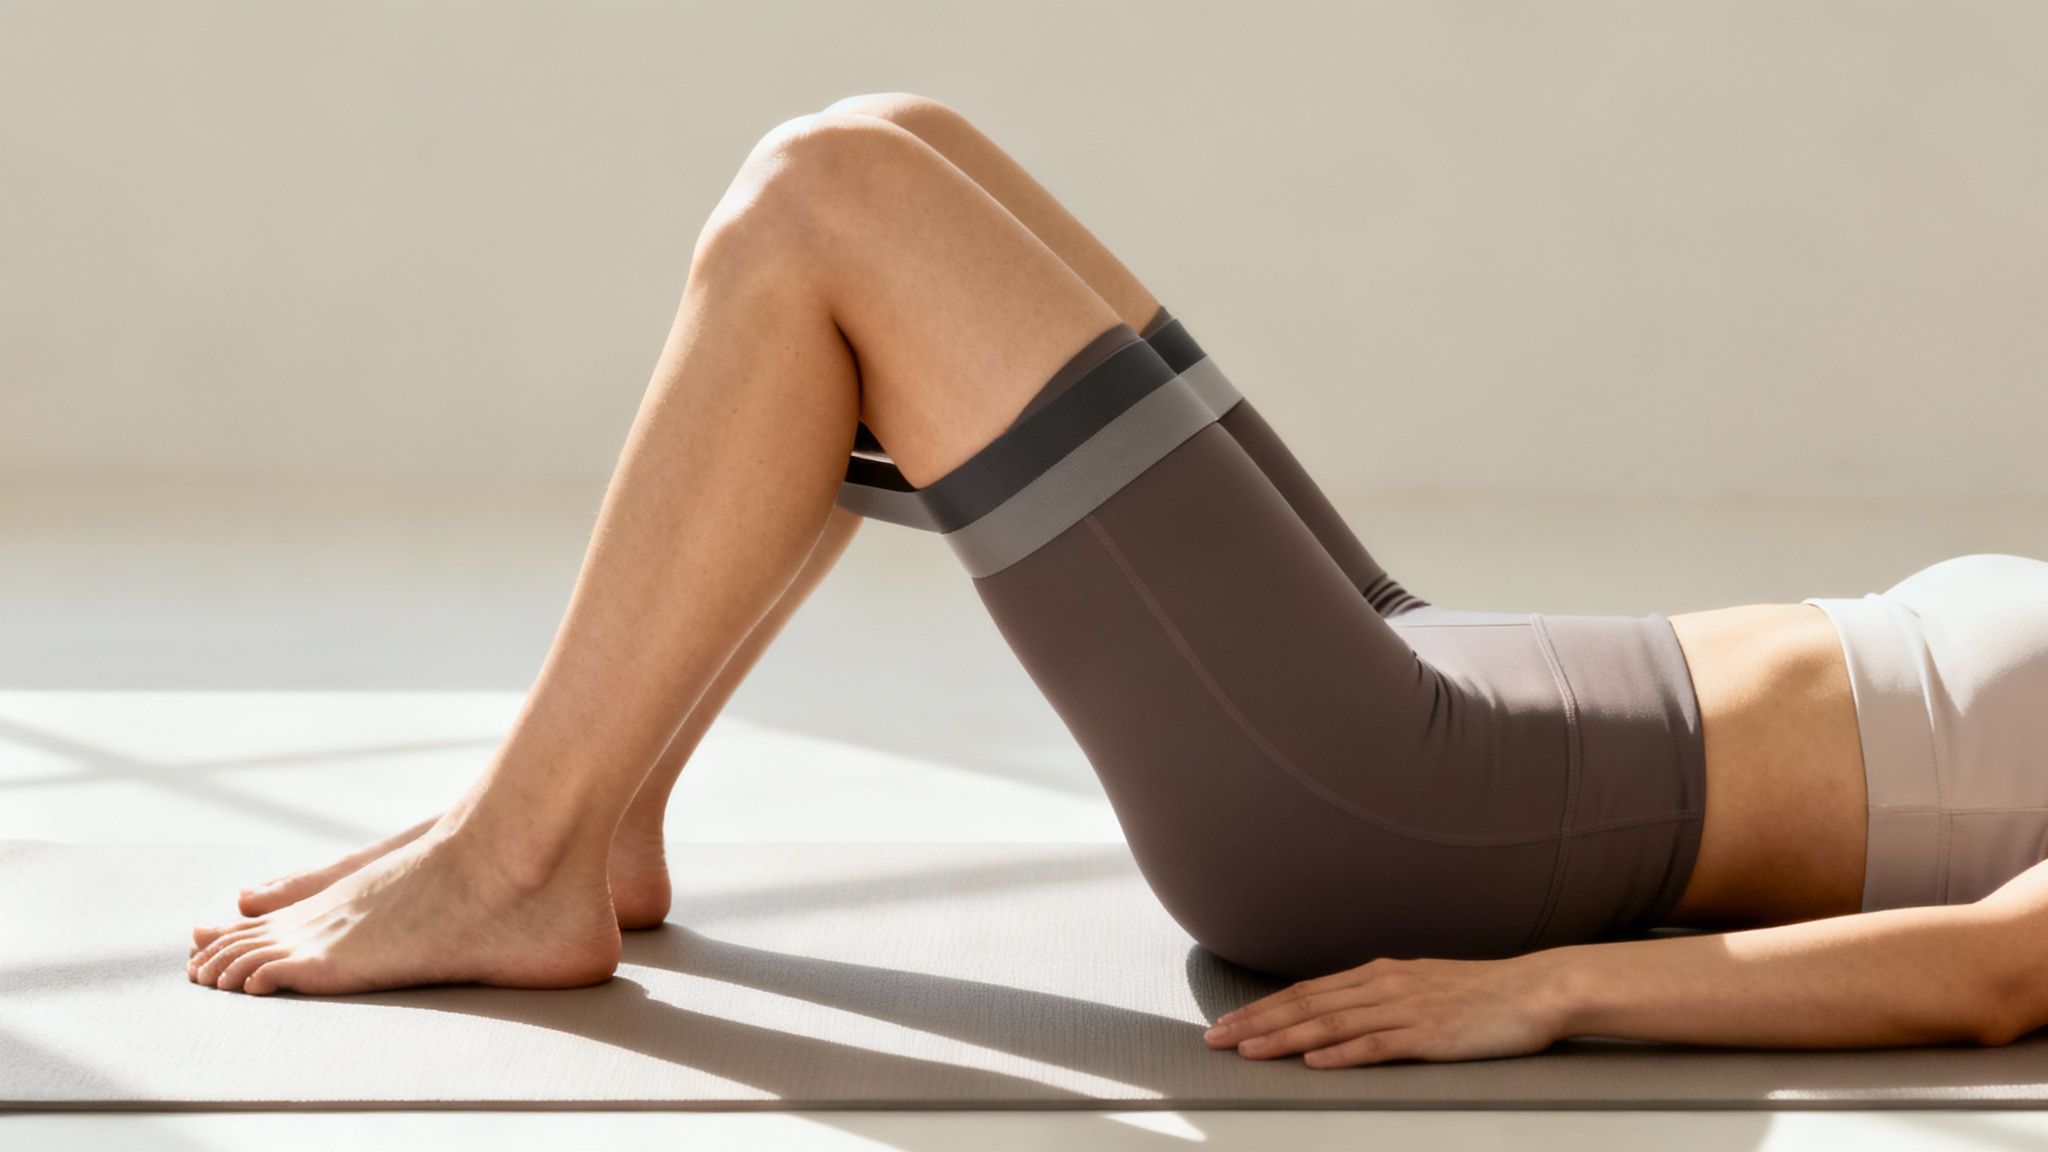
The clamshell is a targeted hip abduction exercise that isolates and strengthens the gluteus medius, a key muscle on the side of your hip. This movement is performed lying on your side and involves rotating the top leg outward while keeping the feet together, mimicking the opening of a clamshell. Strengthening this specific muscle is crucial for knee health, as it stabilizes the pelvis and prevents the knee from collapsing inward during activities like walking, running, and squatting.
Because it is a non-weight-bearing movement, the clamshell places minimal stress on the knee joint itself, making it one of the most highly recommended knee friendly leg exercises. It is a cornerstone of physical therapy, frequently prescribed for individuals with patellofemoral pain syndrome and runners looking to prevent IT band issues. By activating and strengthening weak hip abductors, you improve your entire lower body alignment, which directly reduces excessive strain on the knee.
How to Perform a Clamshell
- Starting Position: Lie on your side with your hips and knees bent at approximately a 45-degree angle. Stack your hips, knees, and ankles directly on top of each other. Rest your head on your bottom arm or hand.
- Execution: Keeping your feet touching, engage your core to prevent your body from rocking backward. Squeeze your glutes and slowly lift your top knee toward the ceiling as high as you can without your hips rolling back.
- Hold and Return: Pause briefly at the top of the movement before slowly and controllably returning your knee to the starting position.
Key Insight: The goal is pure hip rotation, not lifting the leg as high as possible. Focusing on a slow, controlled movement and squeezing the glute at the top ensures you are activating the target muscle (gluteus medius) instead of compensating with other muscles.
Actionable Tips for Success
- Control the Movement: Avoid using momentum. Perform 12-15 reps with deliberate, controlled motion on each side.
- Keep Your Hips Stacked: Place your top hand on your hip to feel for any backward rocking. If you feel your hips open up, you have gone too far.
- Engage Your Core: A braced core is essential for isolating the gluteus medius and protecting your lower back.
- Add Resistance: Once you master the bodyweight version, place a resistance band just above your knees for an added challenge. This progressive overload is key to building strength.
- Focus on Form: For a detailed guide and visual cues to ensure proper alignment, explore the step-by-step instructions for band clamshells.
3. Swimming and Water Walking
Aquatic exercises like swimming and water walking are exceptional knee friendly leg exercises because the buoyancy of water significantly reduces the impact and stress on your joints. The water supports your body weight, allowing you to strengthen your leg muscles against its natural resistance without the jarring forces associated with land-based activities. This unique environment makes it a perfect choice for individuals with knee pain, arthritis, or those recovering from an injury.
The supportive nature of water minimizes gravitational load on the knees, while the viscosity provides gentle, consistent resistance from all directions. This dual benefit allows for a full range of motion that might be painful or impossible on land. Aquatic therapy is a cornerstone of rehabilitation for this reason, used by physical therapists and senior fitness programs to build functional leg strength safely and effectively.
How to Perform Water Walking
- Starting Position: Enter a pool with water at chest or waist height. Stand tall with your shoulders back, core engaged, and a neutral spine.
- Execution: Begin walking forward as you would on land, focusing on a natural heel-to-toe motion. Swing your arms in opposition to your legs to maintain balance and increase the intensity.
- Progression: Walk forward, backward, and sideways to target different muscle groups in your hips and thighs. For swimming, start with gentle flutter kicks while holding onto the side of the pool before progressing to full strokes like freestyle or backstroke.
Key Insight: Water's buoyancy unloads the knee joint, reducing pain and allowing for greater movement, while its resistance strengthens the supporting muscles (quadriceps, hamstrings, and glutes) with every step or kick. It's a two-in-one benefit for knee health.
Actionable Tips for Success
- Choose the Right Depth: Start in chest-deep water for maximum support and buoyancy. As your strength and confidence grow, you can move to shallower water to increase the weight-bearing challenge.
- Maintain Good Posture: Keep your back straight and avoid leaning too far forward. Engaging your core will help you stay upright and stable against the water's push.
- Focus on Consistency: Aim for 20-30 minute sessions, 2-3 times per week, to build muscular endurance and cardiovascular fitness without over-stressing your knees.
- Use Proper Footwear: Consider wearing water shoes with good grip to prevent slipping on the pool floor and provide extra foot support.
- Explore Different Locations: While pools are common, natural bodies of water can also be great. If you're considering a trip and want to incorporate this exercise, you might ask, Is Lake Bled Good for Swimming? Exploring new, scenic spots can make your workout more enjoyable.
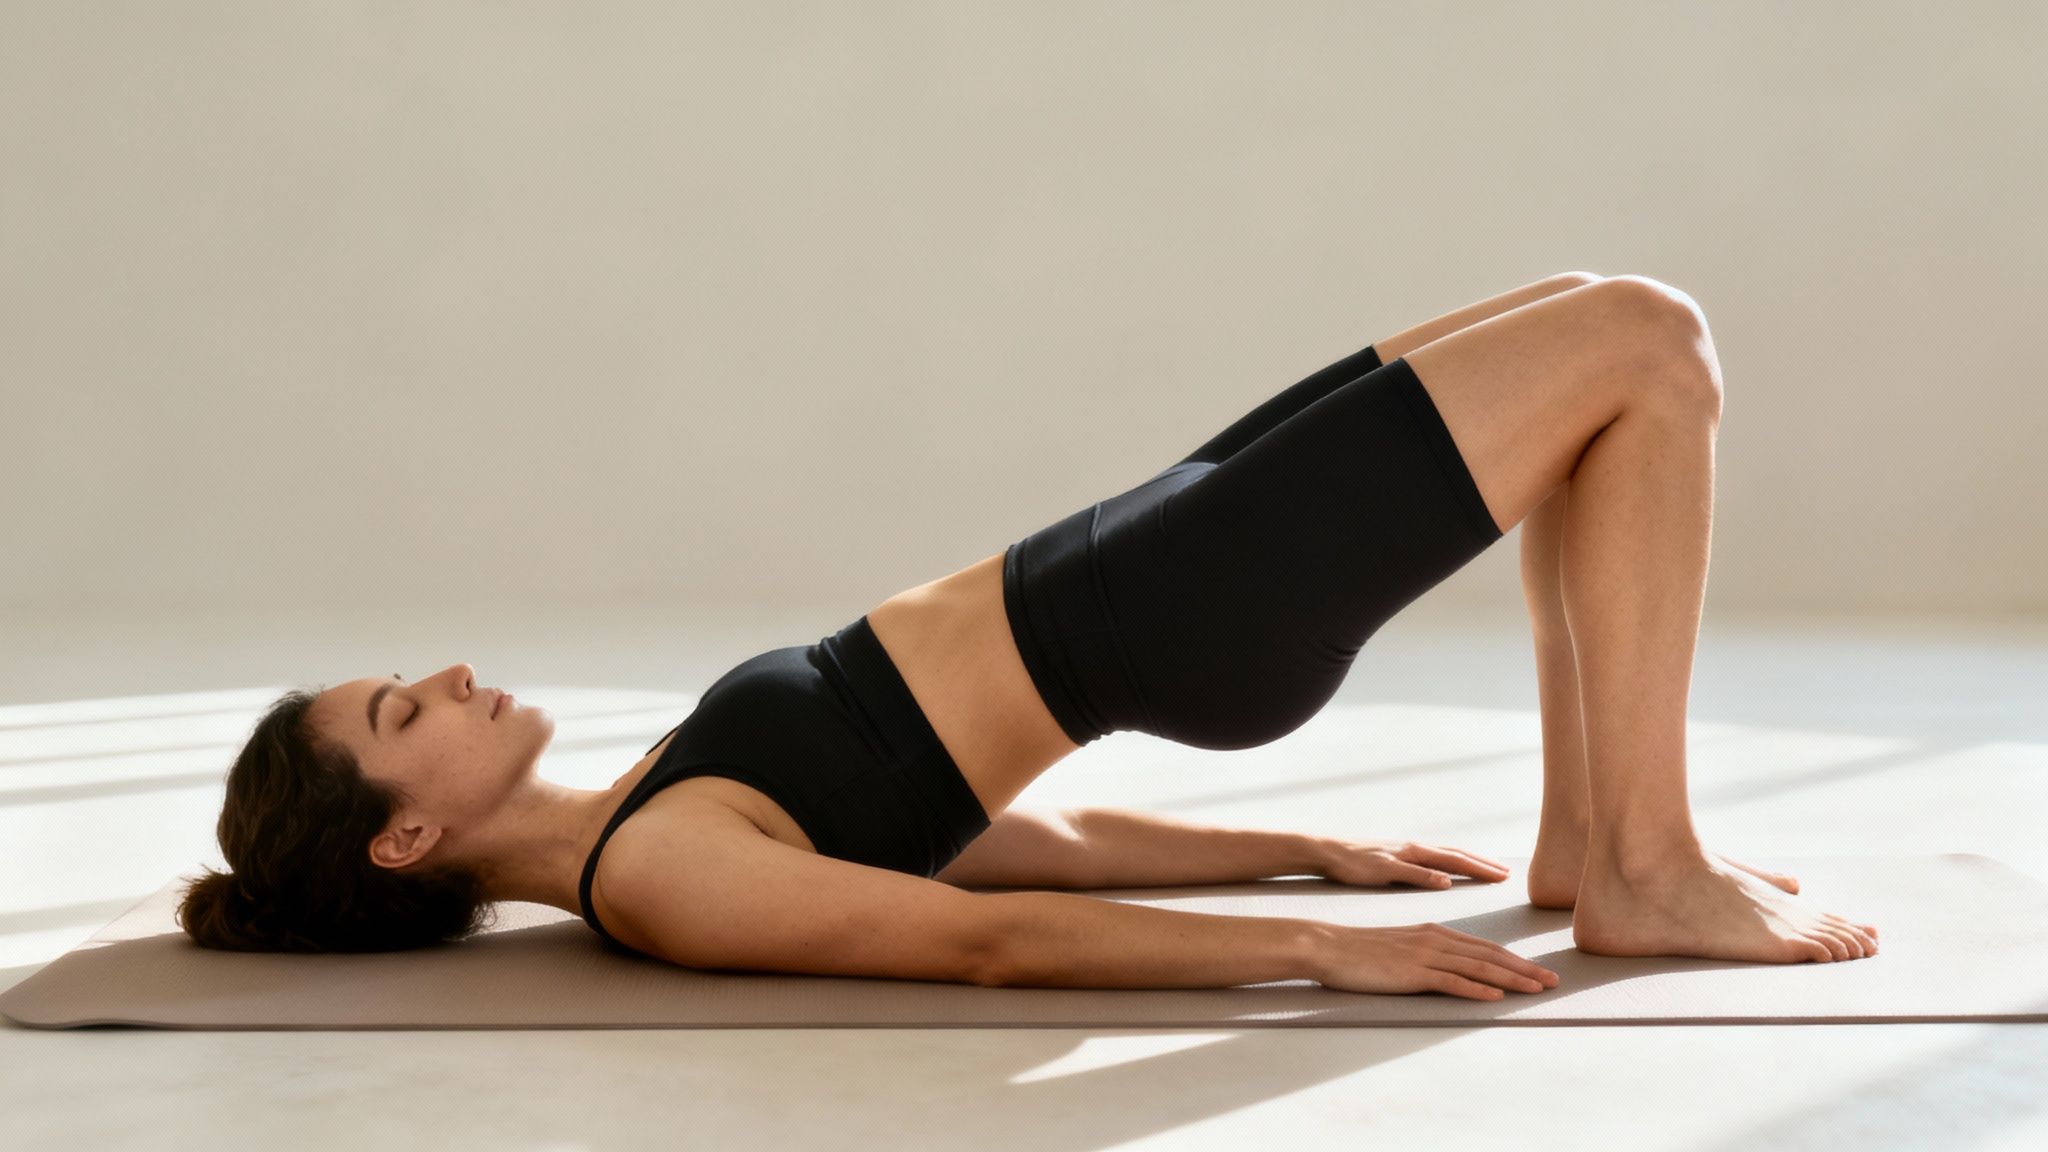
4. Glute Bridges
The glute bridge is a fundamental hip extension exercise performed while lying on your back. By lifting your hips toward the ceiling, you powerfully contract the glutes and hamstrings, the key muscles of your posterior chain. Strengthening these muscles is critical for supporting proper knee alignment and movement mechanics, making the glute bridge one of the most effective knee friendly leg exercises available.
This movement isolates the glutes and hamstrings without placing any direct load or shear force on the knee joints. It is a staple in physical therapy for correcting "gluteal amnesia," a condition where the glutes don't fire properly, forcing other muscles to compensate. Strong glutes help control femur movement, preventing the knee from caving inward (valgus collapse), a common cause of pain.
How to Perform a Glute Bridge
- Starting Position: Lie on your back with your knees bent and feet flat on the floor, about hip-width apart. Position your feet close enough so you can touch your heels with your fingertips. Rest your arms by your sides with your palms facing down.
- Execution: Press through your heels and squeeze your glutes to lift your hips off the floor until your body forms a straight line from your shoulders to your knees. Avoid arching your lower back.
- Hold: Pause at the top for 1-2 seconds, focusing on a strong glute contraction. Lower your hips back to the starting position with control.
Key Insight: The power of the glute bridge comes from its ability to strengthen the posterior chain without knee involvement. This helps rebalance the forces around the knee joint, as strong glutes and hamstrings can offload the quadriceps and reduce patellofemoral stress.
Actionable Tips for Success
- Mind-Muscle Connection: Consciously squeeze your glutes to initiate the lift. Don't just push your hips up using your lower back.
- Maintain a Neutral Spine: Keep your core engaged to prevent your lower back from hyperextending at the top of the movement.
- Heel Drive: Focus on driving through your heels, not your toes. This helps ensure you are activating your glutes and hamstrings effectively.
- Progress Smartly: Once you master the basic bridge, you can advance to single-leg bridges or add a resistance band around your knees to challenge your hip abductors.
- Explore Variations: The glute bridge is a foundational movement for more advanced hip extension exercises. You can learn how the barbell hip thrust builds on this movement to further increase posterior chain strength.
5. Leg Press Machine (Gym-Based)
The leg press machine is a gym-based exercise that allows you to safely strengthen your quadriceps, hamstrings, and glutes in a controlled environment. By sitting with your back fully supported and pushing a weighted sled, you isolate the leg muscles without placing stress on your spine or requiring significant balance. This guided movement path makes it one of the most effective knee friendly leg exercises for building lower body strength with minimal joint strain.
Because the machine controls the range of motion and provides stability, it removes the complexity of free-weight exercises like squats. This makes it an excellent choice for beginners, older adults, or individuals in rehabilitation who need to build foundational strength safely. The predictable movement allows you to focus purely on muscular contraction, making it a staple in both physical therapy clinics and strength training programs for progressive overload.
How to Perform a Leg Press
- Starting Position: Sit on the leg press machine with your back and head resting comfortably against the padded support. Place your feet on the platform, positioned shoulder-width apart.
- Execution: Release the safety bars and push the platform away by extending your legs. Slowly lower the platform back toward you by bending your knees, maintaining control throughout the movement. Stop when your knees form a 90-degree angle.
- Push: Drive through your heels to press the weight back to the starting position. Do not lock your knees at the top; keep a slight bend to maintain tension on the muscles.
Key Insight: The primary advantage of the leg press is its stability. The machine-guided path minimizes the risk of improper form and allows you to load the muscles effectively without the stabilization demands that can challenge sensitive knees.
Actionable Tips for Success
- Mind Your Knee Angle: Avoid letting your knees bend past 90 degrees, as deeper flexion can increase pressure on the patella.
- Control the Negative: Lower the weight with a slow, controlled motion (the eccentric phase) to maximize muscle engagement and protect your joints.
- Keep Your Back Flat: Ensure your lower back and hips remain firmly against the seat pad throughout the exercise. Do not allow your hips to lift off the seat.
- Never Lock Your Knees: Fully locking out the knees at the top of the movement can hyperextend the joint, placing it under unnecessary stress.
- Start with Moderate Weight: Begin with a weight that allows you to complete 2-3 sets of 8-12 repetitions with perfect form. While the leg press is safer than many free-weight exercises, it's different from more isolated movements like leg extensions and still requires proper technique.
6. Step-Ups (Controlled)
A controlled step-up is a functional exercise that builds unilateral leg strength by mimicking the movement of climbing stairs. This exercise targets the quadriceps, glutes, and hamstrings, improving balance and power in each leg individually. By emphasizing slow, deliberate movement and using an appropriate platform height, it becomes one of the best knee friendly leg exercises for building real-world strength without compromising joint health.
The controlled nature of this movement eliminates jarring impacts and prevents momentum from taking over, ensuring the leg muscles do all the work. It is frequently used in physical therapy to help patients regain functional strength after an injury and is a staple for athletes and runners aiming to correct strength imbalances between their legs. This focus on unilateral stability directly strengthens the muscles that support and protect the knee joint during daily activities.
How to Perform a Controlled Step-Up
- Starting Position: Stand facing a sturdy box, bench, or step. The platform should be low enough that your knee does not bend beyond a 90-degree angle when you place your foot on it.
- Execution: Place your right foot firmly onto the center of the platform. Press through your right heel to lift your body straight up until your right leg is straight. Your left foot should follow but remain off the platform.
- Hold and Descend: Pause briefly at the top, maintaining balance. Slowly and with control, lower yourself back down until your left foot touches the floor, completing one repetition.
Key Insight: The magic of the step-up for knee health lies in the controlled ascent and, more importantly, the slow, eccentric descent. This controlled lowering phase builds immense stability and strength in the supporting muscles around the knee.
Actionable Tips for Success
- Start Low: Begin with a low platform, such as a 6 to 8-inch step. You can gradually increase the height as your strength and confidence improve.
- Drive, Don't Push: Focus on driving through the heel of your elevated foot to lift your body. Avoid pushing off with your back foot, which uses momentum instead of muscle.
- Maintain Upright Posture: Keep your chest up, shoulders back, and core engaged throughout the entire movement to protect your spine and maintain balance.
- Control the Descent: The lowering phase is just as important as the step up. Lower yourself slowly over 2-3 seconds to maximize muscle engagement and protect your knee.
- Complete All Reps: Finish all repetitions on one leg before switching to the other. This ensures each leg is fully challenged. Aim for 3 sets of 8-10 reps per leg.
7. Stationary Cycling (Stationary Bike)
Stationary cycling is a premier low-impact cardiovascular exercise that strengthens the quadriceps, hamstrings, and glutes through a smooth, controlled pedaling motion. Because the bike supports your body weight, it removes the impact stress from running or jumping, making it one of the most highly recommended knee friendly leg exercises for building endurance and muscle without irritating sensitive joints.
This exercise is a cornerstone of physical therapy, especially for post-operative knee rehabilitation like ACL recovery, as it encourages joint mobility and blood flow in a safe, supported environment. The consistent, cyclical movement helps lubricate the knee joint and strengthens surrounding muscles, providing enhanced stability and function. It is also a fantastic tool for active recovery, allowing athletes to maintain cardiovascular fitness while giving their joints a rest from high-impact activities.
How to Perform Stationary Cycling
- Setup: Adjust the bike seat so that when your foot is at the bottom of the pedal stroke, your knee has a slight bend (around 5-10 degrees). Slide the seat forward or backward to ensure your knee tracks over the ball of your foot.
- Execution: Begin pedaling at a comfortable pace with light resistance to warm up. Maintain a steady cadence, keeping your upper body relaxed and your core engaged.
- Progression: Gradually increase the resistance or your pedaling speed (cadence) to challenge your muscles and cardiovascular system.
Key Insight: The controlled, non-weight-bearing nature of stationary cycling allows you to build significant leg strength and improve your knee's range of motion without the compressive forces that can cause pain. It effectively decouples intensity from impact.
Actionable Tips for Success
- Prioritize Proper Setup: Correct seat height and position are critical for preventing knee strain. A seat that is too low can increase pressure on the kneecap.
- Focus on a Smooth Cadence: Aim for a consistent pedal speed (cadence) of 80-100 RPM for endurance. Avoid "mashing" the pedals; instead, think about pulling up as much as you push down.
- Start with Moderate Duration: Begin with 20-30 minute sessions, 3-4 times per week. As your fitness improves, you can increase the duration or intensity.
- Incorporate Intervals: For a greater strength-building challenge, try interval training. Alternate between 1-2 minutes of high resistance or high speed and 1-2 minutes of easier recovery pace.
- Vary Your Workouts: To learn more about different approaches to cardiovascular training and how to structure your sessions for maximum benefit, explore everything about cardio.
8. Bulgarian Split Squats (Rear-Foot Elevated)
The Bulgarian split squat is an advanced single-leg exercise that challenges your strength, stability, and mobility. By elevating your rear foot on a bench or box, you place the majority of the load on your front leg, intensely targeting the quadriceps, glutes, and hamstrings. While it requires more stability, this movement can be considered a knee friendly leg exercise when performed with precise form, as it builds unilateral strength that corrects imbalances and enhances joint support.
This exercise is a staple in advanced rehabilitation and athletic training because it develops single-leg power and balance without the heavy spinal loading of traditional barbell squats. For individuals with healthy knee mechanics looking to progress, it offers a way to increase intensity and challenge the stabilizing muscles around the knee joint in a controlled manner. It mimics functional movement patterns, like climbing stairs or lunging, making it highly practical for everyday strength.
How to Perform a Bulgarian Split Squat
- Starting Position: Stand about two to three feet in front of a knee-high bench or box. Extend one leg back and rest the top of your foot on the elevated surface. Your front foot should be planted firmly on the ground.
- Execution: Keeping your torso upright and core engaged, lower your body by bending your front knee. Descend until your front thigh is nearly parallel to the floor, allowing your back knee to move toward the ground.
- Ascend: Drive forcefully through your front heel to return to the starting position. Maintain control and balance throughout the entire movement. Complete all repetitions on one side before switching to the other.
Key Insight: The unilateral nature of this exercise exposes and corrects strength imbalances between your legs. Strengthening each leg independently provides more robust and balanced support for the knee joints, which is critical for preventing future injuries.
Actionable Tips for Success
- Find Your Footing: Before adding weight, find the right distance from the bench. Your front shin should be relatively vertical at the bottom of the squat to minimize forward pressure on the knee.
- Control the Descent: Focus on a slow, controlled negative (lowering phase). This builds muscle and stability while reducing the risk of your knee tracking improperly.
- Maintain an Upright Torso: Avoid leaning too far forward, as this can shift stress to your lower back and away from your legs. Keep your chest up and shoulders back.
- Start with Bodyweight: Master the movement with just your bodyweight before considering adding dumbbells or a kettlebell.
- Modify the Height: If a standard bench feels too high or unstable, start with a lower step or a stack of weight plates to gradually build confidence and mobility.
Side-by-Side Comparison of 8 Knee-Friendly Leg Exercises
| Exercise | Implementation complexity | Resource requirements | Expected outcomes | Ideal use cases | Key advantages |
|---|---|---|---|---|---|
| Isometric Wall Sits | Low — simple static hold, easy to learn | None (wall and mat) | Increased quadriceps endurance and joint-safe strength | Knee injury/arthritis rehab, home workouts | Extremely joint-friendly, easy to modify |
| Clamshells (Glute Activation) | Low–Medium — requires precise hip positioning | None or resistance band | Improved glute medius activation and hip stability | Patellofemoral pain, runners, early rehab | Targets hip stabilizers with minimal knee stress |
| Swimming and Water Walking | Low — low skill barrier, easy progression | Pool access and time | Strength + cardiovascular gains with very low joint load | Severe knee injuries, arthritis, post-surgical rehab | Buoyancy reduces impact; full ROM training |
| Glute Bridges | Low–Medium — cueing for hip hinge and glute squeeze | None or added weight for progression | Stronger posterior chain, improved hip extension | Correcting glute weakness, general strength work | Safe for knees, scalable and posture-improving |
| Leg Press Machine (Gym-Based) | Medium — setup and load management needed | Leg press machine (gym) | Progressive bilateral leg strength with measurable load | Gym-based rehab, load tolerance building | Controlled movement path; easy progressive overload |
| Step-Ups (Controlled) | Medium — balance and single-leg control required | Sturdy step/platform, optional weights | Unilateral leg strength, balance, functional transfer | Functional training, rehab progression, runners | Direct carryover to daily activities and stairs |
| Stationary Cycling (Stationary Bike) | Low — low technical demand, adjustable intensity | Stationary bike (gym or home) | Cardiovascular fitness and leg endurance with low impact | Weight loss, ACL rehab, low-impact cardio | Low joint stress; adjustable resistance and duration |
| Bulgarian Split Squats (Rear-Foot Elevated) | High — advanced single-leg pattern, form critical | Elevated surface; optional weights | High unilateral strength and imbalance correction | Advanced trainees, athletes, asymmetry correction | Very effective single-leg strength builder; progressive loading |
Your Next Step Towards Pain-Free Leg Workouts
Navigating the world of leg training with sensitive knees can feel like walking a tightrope. One wrong move, one poorly chosen exercise, and you're set back for days. However, this comprehensive guide has demonstrated that building a strong, resilient lower body is not about avoiding training altogether; it's about making intelligent, informed choices. The eight knee friendly leg exercises detailed in this article, from foundational Glute Bridges to controlled Bulgarian Split Squats, offer a powerful blueprint for progress without pain.
The core principle weaving through each exercise is simple yet profound: support the knee by strengthening the muscles around it. By shifting the focus to your glutes, hamstrings, and quads through controlled, low-impact movements, you create a muscular support system that offloads stress from the knee joint itself. This is the key to long-term joint health and sustainable fitness.
Recapping Your Toolkit for Strong, Happy Knees
Let's distill the most critical takeaways from the exercises we've explored. Think of these as your non-negotiable rules for safe and effective knee-friendly training:
- Prioritize Glute Activation: Exercises like Clamshells and Glute Bridges are not just warm-ups; they are essential for "waking up" the powerful gluteal muscles. When your glutes fire properly, they take a significant amount of pressure off your knees during larger movements.
- Embrace Isometric Holds: The Wall Sit is a perfect example of how to build quadriceps strength and endurance without any joint movement. This static contraction creates muscular tension and stimulates growth while completely bypassing the mechanical stress of flexion and extension under load.
- Master Controlled Eccentrics: For movements like Step-Ups and Bulgarian Split Squats, the "lowering" phase (eccentric portion) is where you build control and stability. Rushing this part of the repetition is a common mistake that can irritate the knee. Slow it down and own the movement.
- Respect Your Range of Motion: Pain is your body’s signal to stop. Whether on the Leg Press or during a Step-Up, never push into a range of motion that causes sharp or uncomfortable sensations in your knee. A shorter, pain-free range of motion is infinitely more productive than a full range that causes inflammation.
From Knowledge to Action: Building Your Consistent Routine
Understanding these principles is the first step, but consistent application is what creates lasting change. Don't feel pressured to incorporate all eight exercises at once. Instead, build your routine gradually. Start with two or three exercises that feel the most comfortable and accessible. A great starting point for a home workout could be Glute Bridges, Clamshells, and Wall Sits. As you build confidence and strength, you can introduce more complex movements like controlled Step-Ups.
The goal is not to have one perfect workout. The goal is to create a consistent habit of safe, effective training that your body can adapt to and benefit from over time. Consistency will always trump intensity when it comes to joint health.
Remember to listen to your body above all else. Some days you may feel strong and capable of pushing the reps or adding a progression. On other days, scaling back to a regression or focusing purely on activation work is the smartest choice. This adaptive approach is not a sign of weakness; it's a sign of intelligent training that will keep you in the game for the long run. By implementing these knee friendly leg exercises with precision and patience, you are not just building stronger legs, you are investing in a future of pain-free movement, greater confidence, and limitless physical potential.
Ready to take the guesswork out of your workouts and ensure perfect form on every rep? The AI-powered Zing Coach app creates personalized training plans based on your unique needs and limitations, using computer vision to provide real-time feedback that keeps you safe. Start your journey to stronger, healthier knees today by downloading the app at Zing Coach.