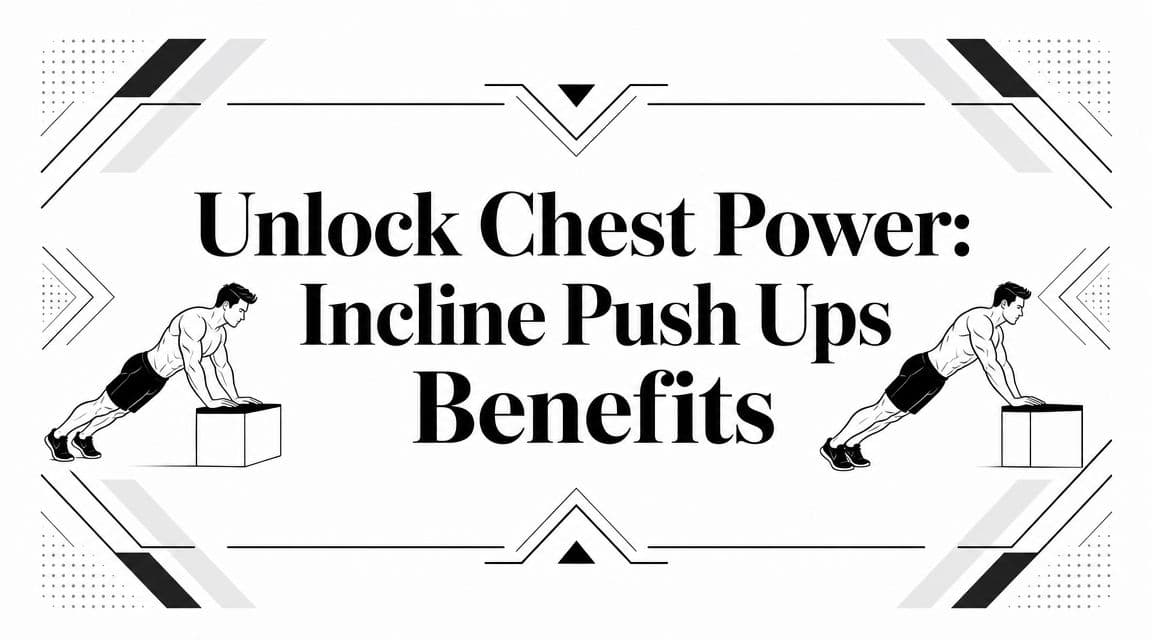
Unlock powerful incline push ups benefits for chest strength. Learn proper form, avoid mistakes, & master your first push up with our progression plan.
Many individuals don't discover incline push-ups because they're curious. They discover them after a frustrating moment on the floor.
You get into a standard push-up position, lower halfway, and either your hips sag, your elbows flare, or you can't press back up. That doesn't mean you're weak. It usually means the variation is ahead of your current strength, control, or joint tolerance.
That's where incline push-ups earn their place. They aren't a shortcut. They're a smarter entry point. By changing the angle, you keep the same basic pushing pattern while making the movement manageable enough to practice well, repeat consistently, and progress on purpose.
A lot of beginners bounce between failed floor push-ups and random easier versions with no plan. That's what this article fixes. You'll learn what incline push-ups do, how to perform them cleanly, and how to lower the incline over time so you build toward a full push-up instead of staying stuck at the same level.
Struggling with Push Ups? There's a Better Place to Start
A new client will often say the same thing: “I can do them against a wall, but floor push-ups feel impossible.”
That gap is normal. Floor push-ups ask for more than chest strength. You need trunk stiffness, shoulder control, and enough pressing strength to move your body as one piece. If one part gives out, the whole rep falls apart.
Incline push-ups solve that problem in a practical way. They let you train the movement pattern without forcing bad reps. Your hands go on a stable raised surface, such as a wall, countertop, bench, or Smith machine bar. Because your body is more upright, the exercise becomes easier to control.
For many people, that first success matters as much as the strength work itself. Once you can do smooth, repeatable reps, you stop guessing and start training.
Why this starting point works
A good beginner exercise should do three things:
- Match your current ability: You should be able to complete reps with control, not survive them.
- Teach the final skill: The movement should look like the exercise you want to earn later.
- Allow progression: It should get harder in small steps, not one giant jump.
Incline push-ups check all three boxes. If floor push-ups are still too much, a temporary bridge like knee push-ups can help. But for many people, incline work is the cleaner path because it keeps your body in a straight line and teaches the same pressing mechanics you'll use on the floor.
Start where you can move well, not where your ego wants to start.
That's the difference between a plan that lasts two workouts and one that builds strength.
What Are Incline Push Ups and How Do They Work?
An incline push-up is a push-up done with your hands on a raised surface and your feet on the floor. The higher your hands are, the easier the movement becomes. The lower the surface, the more demanding it gets.
The easiest way to understand it is to think about pushing a heavy object up different slopes. A gentle slope feels more manageable than a steep one. Incline push-ups work similarly. A more upright body angle means you're pressing less of your bodyweight.
Why the angle changes the difficulty
When your hands are raised, some of the load shifts away from your upper body. That gives your chest, shoulders, and triceps room to learn the motion without being overloaded from the first rep.
According to NASM's incline push-up exercise guide, incline push-ups are widely used as a progression exercise because they reduce the amount of bodyweight being pressed. NASM describes them as an essential progression toward full push-ups and recommends 3 sets of 8 to 15 repetitions for foundational strength.
That recommendation matters because it frames incline push-ups correctly. They're not a “light” exercise you outgrow immediately. They're a scalable strength tool.
What muscles you train
You're still training the same broad pattern as a floor push-up. The main work comes from:
- Chest: Drives the pressing motion.
- Triceps: Straighten the elbows as you push away.
- Front shoulders: Help control and assist the press.
- Core: Keeps your ribs, pelvis, and spine aligned so the body moves as one unit.
Healthline notes, in the verified summary provided, that the inclined position takes some pressure off the arms and shoulders while still requiring core engagement to keep the body in a straight line. That's why incline push-ups are useful far beyond absolute beginners. They help returning exercisers rebuild capacity, and they let experienced trainees add controlled volume without forcing ugly reps.
Why coaches keep using them
The primary value is adjustability.
- Wall level: Good when pressing strength is very limited.
- Counter height: A solid middle ground for many beginners.
- Bench or low bar: A bridge toward floor work.
If the movement is too hard, raise the hands. If it's too easy, lower them. You don't need a different exercise every time. You need the right version of the same one.
Mastering Your Form: How to Do Incline Push Ups Correctly
Form decides whether incline push-ups build strength or just rehearse compensation. Most problems show up before the first rep, during setup.
A quick warm-up helps. Before pressing, use a few minutes of shoulder circles, arm swings, and gentle activation work. If you need ideas, this guide on how to warm up before strength training covers the basics well.

Step by step setup
Choose a stable surface
Use a wall, countertop, bench, box, or bar that won't slide. If the setup wobbles, your body will tense in the wrong places.Place your hands about shoulder width apart
Fingers point forward. Your grip shouldn't be extremely wide or narrow unless you're using a deliberate variation.Walk your feet back until your body forms a straight line
Think head, ribs, hips, knees, and heels lined up. Squeeze your glutes lightly and brace your midsection.Lower under control
Bend the elbows and bring your chest toward the surface. Let the elbows angle slightly back rather than shooting straight out to the sides.Press away in one piece
Push the surface away and return to the start without letting your hips lag behind.
Cues that make the rep cleaner
A few simple cues fix a lot of technique issues:
- “Bring your chest to the edge.” This encourages full range instead of tiny half reps.
- “Keep your belt buckle and ribs moving together.” That helps prevent sagging or piking.
- “Screw your hands into the surface.” Even if your hands don't move, this cue can improve shoulder stability.
For a visual demo, this walkthrough helps many beginners connect the cues to the movement:
Common mistakes to avoid
Practical rule: If your body doesn't move as one unit, the incline is probably too low for your current strength.
Here are the errors I correct most often:
- Sagging hips: This usually means you've lost core tension. Fix it by raising the incline and bracing before each rep.
- Elbows flaring too wide: This can make the shoulders feel crowded. Tuck them slightly rather than pinning them tightly to your sides.
- Hands too far forward: If your hands are too high in front of your shoulders, the rep gets awkward. Stack yourself in a position that feels balanced.
- Worming up from the bottom: If your chest rises first and your hips follow, reduce the difficulty and rebuild clean reps.
What a good rep should feel like
A good incline push-up should feel stable, smooth, and repeatable. You should notice the chest, triceps, shoulders, and midline working together. It shouldn't feel like your lower back is doing the job.
If it does, don't push through that pattern. Adjust the surface and earn better reps.
The Top Incline Push Up Benefits for Your Fitness Goals
The biggest mistake people make with incline push-ups is treating them like a temporary beginner drill with no real training value. In practice, they're useful because they let you train the push-up pattern often enough, cleanly enough, and progressively enough to get stronger.

Better upper body strength without guessing
Incline push-ups train the same major pressing muscles you need for standard push-ups. That makes them one of the most useful ways to build beginner strength that translates.
The benefit isn't just that they're easier. It's that they're adjustable. You can work in a rep range that feels challenging but still looks solid, which is where one tends to make better progress than with repeated failed floor attempts.
If you also use loaded pressing in your program, movements such as the incline dumbbell press can complement bodyweight work well. The two aren't interchangeable, but they support the same broader goal of stronger pressing.
More core involvement than most beginners expect
People tend to think of push-ups as a chest exercise. They're not just that.
To do the movement well, you need your trunk to resist collapsing while your arms move. That's why incline push-ups often help beginners understand what “brace your core” is supposed to feel like in a real exercise. You're not crunching. You're stabilizing.
A cleaner trunk position usually improves pressing mechanics too. When your ribs and pelvis stay connected, your shoulders often feel more stable and the rep becomes smoother.
A more joint-friendly option for many people
Incline push-ups often feel better on the wrists, shoulders, and elbows because you're pressing less bodyweight. For someone returning to training, that reduced load can make the difference between tolerating a push pattern and avoiding one.
That said, this is where nuance matters. In a 10-year cohort study of 1,104 physically active adult men, those who could complete more than 40 push-ups at baseline had a 96% lower risk of incident cardiovascular disease events than those who could do fewer than 10. That study measured push-up capacity, not incline push-ups specifically, but it supports why push-up-style training is often used as a marker of upper-body and whole-body fitness. The same verified summary also notes that incline push-ups can place less pressure on joints by reducing load, but they are a modifiable tool, not a universal rehabilitation solution for every type of shoulder or wrist pain.
So if incline push-ups hurt in a sharp, specific, or worsening way, don't assume the exercise is automatically right for you just because it's easier than the floor version.
Why they work so well for busy people
They require almost no setup. A countertop, bench, bar, or sturdy table is enough. That matters more than people think.
- At home: You can slot a few sets into a short workout without equipment changes.
- In a gym: You can use a bench or Smith machine bar and adjust quickly.
- While rebuilding fitness: You can keep the movement pattern consistent while changing only the angle.
The best exercise progression is the one you can repeat often enough to improve.
That's one of the most practical incline push ups benefits. They remove friction. Less friction usually means better consistency.
Your Practical Progression Plan to Get Stronger
Most articles stop at “lower the surface over time.” That advice is directionally right, but it's not enough. People need a rule for when to progress.
A useful framework is simple: master the current height, then lower it slightly. The point isn't to chase the hardest version available. The point is to accumulate quality volume while gradually increasing the load on your chest, shoulders, and triceps. That progression logic aligns with the practical guidance discussed in Women's Health's incline push-up overview.

Pick the right starting height
Your starting surface should let you complete all planned reps with good control. For one person that's a wall. For another it's a kitchen counter or bench.
Use this quick decision filter:
- Stay at the current height if your body stays aligned and every rep looks similar.
- Raise the hands if you're sagging, worming up, or stopping short on most reps.
- Lower the hands only when the current version feels controlled across all sets.
If you're also applying broader progressive overload training, this fits the same principle. Increase challenge only after your current workload is solid.
The progression rule that works
Use NASM's foundational rep target from earlier in the article as your working zone. Aim for 3 sets of 8 to 15 repetitions with clean form at your chosen height. Once you can hit the top end of that range consistently, lower the incline a little and rebuild.
That gives you a repeatable process:
- Choose a surface.
- Train it until your reps are stable.
- Lower the height slightly.
- Expect your reps to drop at the new level.
- Build them back up.
Don't rush this. Strength improves faster when the reps stay honest.
Sample 4-Week Incline Push Up Progression
| Week | Workout Days | Sets x Reps | Progression Goal |
|---|---|---|---|
| Week 1 | 2 to 3 days | 3 x 8 to 10 | Find a height that allows smooth reps and a straight body line |
| Week 2 | 2 to 3 days | 3 x 10 to 12 | Keep the same height and improve control, depth, and consistency |
| Week 3 | 2 to 3 days | 3 x 12 to 15 | If all sets are clean, test a slightly lower surface on the last set |
| Week 4 | 2 to 3 days | 3 x 8 to 12 | Move to the lower surface if form holds. If not, stay and repeat the cycle |
What works and what usually fails
What works is boring in the best way. You practice the same movement, track the same standard, and make small changes only when you've earned them.
What fails is jumping too fast. People often go from a countertop to the floor because they had one good session. Then the reps break down, the shoulders get cranky, and progress stalls.
If you're training around old aches, form quality matters even more than rep chasing. Resources focused on injury prevention for athletes in SE MA can be useful if you want more context on how strength progression and tissue tolerance fit together.
For people who like adaptive structure, Zing Coach can build training plans around current ability, available equipment, and recovery, which is helpful when your ideal push-up progression isn't the same as someone else's.
Incline vs Standard vs Decline Push Ups: Which Is Best?
No push-up variation is “best” in every situation. The right one depends on your current strength and your goal.

Side by side differences
| Variation | Difficulty | Main emphasis | Best use |
|---|---|---|---|
| Incline push-up | Easiest of the three | Lower chest, front shoulders, triceps, core control | Beginners, rebuilding strength, higher-quality volume |
| Standard push-up | Moderate | Overall chest, front shoulders, triceps, full-body tension | Foundational bodyweight strength |
| Decline push-up | Most demanding | Greater upper chest and shoulder demand, plus more overall load | Advanced strength work and progression after standard push-ups |
How to choose the right one
Choose incline push-ups if you need a version that lets you own the pattern. They're the best fit when your floor reps are inconsistent or your joints tolerate a reduced load better.
Choose standard push-ups if you can already control your bodyweight on the floor without losing alignment.
Choose decline push-ups if standard reps are solid and you want a more challenging variation. If that's your next step, this guide to decline push-ups can help you compare the setup and demands.
A progression only counts if the harder version still looks like the original movement.
That's the key takeaway. Incline push-ups aren't just the easier cousin of standard push-ups. They're the version that teaches many people how to build toward strong, clean, repeatable reps.
If you want a plan that adjusts your push-up variation, workout volume, and progression based on your current level, Zing Coach can help you train with more structure and less guesswork.